
Keurig K40 Elite Manual: A Comprehensive Guide
This manual provides detailed instructions for operating, maintaining, and troubleshooting your Keurig K40 Elite brewer, ensuring optimal performance and longevity.
Welcome to the world of convenient, single-cup brewing! The Keurig K40 Elite is designed to deliver a fresh, flavorful cup of coffee, tea, or hot cocoa with incredible ease. This brewer streamlines your morning routine, offering a quick and customizable beverage experience. Understanding its features and proper operation, as detailed in this manual, will maximize your enjoyment.
The K40 Elite boasts a compact design and user-friendly controls, making it a perfect addition to any kitchen or office space. This guide will walk you through setup, brewing, cleaning, and troubleshooting, ensuring years of reliable performance. Remember to consult the safety precautions outlined within for optimal and secure usage.
Understanding the Keurig K40 Elite Features
The Keurig K40 Elite offers several key features designed for convenience and customization. It’s compatible with all K-Cup pods, providing a vast selection of beverage choices. The brewer includes a simple button operation for easy brewing, and selectable brew sizes to match your preferred cup.
A notable feature is the automatic shut-off, enhancing safety and energy conservation. The removable drip tray accommodates various mug sizes, preventing spills. Regular cleaning is crucial, and the K40 Elite features easily accessible components for maintenance. Understanding these features will allow you to fully utilize and appreciate your Keurig brewer’s capabilities.

Setting Up Your Keurig K40 Elite
Proper setup is essential for optimal brewing. This involves filling the water reservoir, plugging in the unit, and performing an initial brew cycle for cleaning.
Initial Setup and Water Reservoir Filling
Before your first brew, thoroughly rinse the water reservoir and lid with fresh water. Remove the reservoir, locate the fill lines indicating maximum capacity, and fill with desired amount of potable water. Ensure the water level does not exceed the ‘MAX’ fill line. Replace the reservoir securely onto the brewer base, confirming it’s properly seated.
The quality of your water significantly impacts the taste of your brewed beverage; filtered water is highly recommended. Regularly cleaning the reservoir prevents mineral buildup, maintaining optimal brewer performance. Always unplug the brewer before removing or filling the water reservoir for safety.
Powering On and First Brew Cycle
To power on your Keurig K40 Elite, simply press the Power button. Verify the Power Light illuminates, indicating the brewer is receiving electricity and is ready for operation. Before brewing your first cup, it’s recommended to run a few brew cycles with only water – no K-Cup pack inserted.
This initial flush cleans the internal components and ensures optimal flavor in subsequent brews. Select your desired brew size and initiate the brew cycle by pressing the Brew button. Discard the hot water after each flush. Repeat this process 2-3 times for best results.

Brewing with Your Keurig K40 Elite
Enjoy a perfect cup effortlessly! This section details the simple steps for inserting K-Cup packs, selecting brew sizes, and activating the brew button for optimal results.
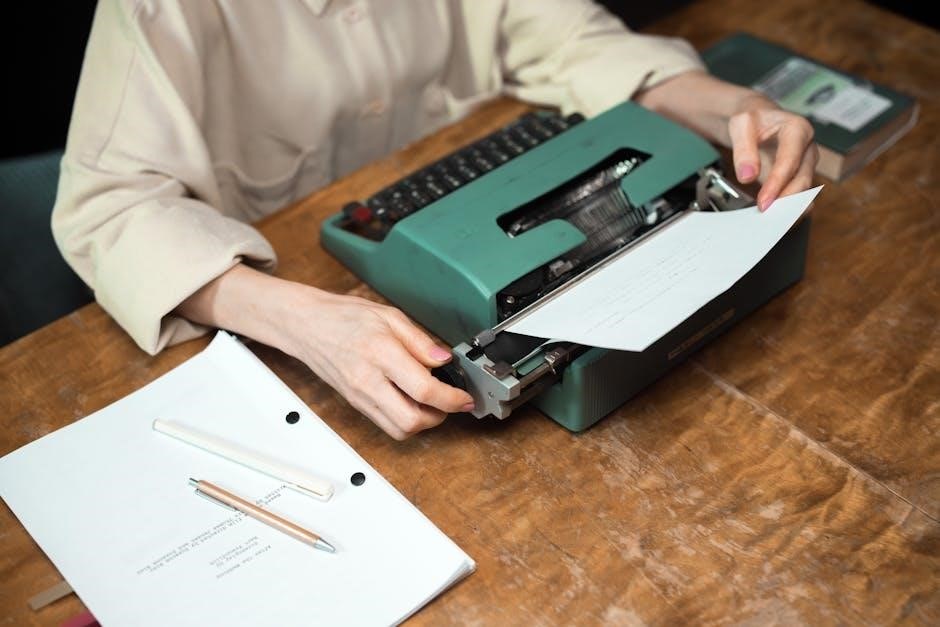
Inserting K-Cup Packs
Preparing your favorite beverage is remarkably simple with the Keurig K40 Elite. Begin by lifting the K-Cup pack holder handle located on the top of the brewer. Place a K-Cup pack into the K-Cup holder, ensuring it sits securely. It’s crucial to confirm the K-Cup pack is properly seated before closing the handle.
Close the handle completely; you should feel it secure. A properly secured handle activates the brew buttons, allowing the brewing process to commence. If the handle doesn’t secure, double-check the K-Cup pack placement. Avoid using foil-sealed K-Cup packs, as they may cause issues. Always use genuine K-Cup packs for optimal performance and to prevent potential damage to your brewer.
Selecting Brew Sizes
The Keurig K40 Elite offers convenient brew size options to customize your perfect cup. Before initiating the brew cycle, select your desired cup size. The brewer typically features options for 6oz, 8oz, and 10oz brews, catering to various mug sizes and beverage preferences.
To choose a brew size, simply press the corresponding button illuminated on the control panel. The selected size will be indicated by an illuminated light. Ensure your mug is appropriately sized for the chosen brew volume to prevent spills. Experiment with different sizes to discover your ideal strength and flavor profile for each K-Cup variety.
Using the Brew Button
Initiating a brew cycle with your Keurig K40 Elite is straightforward. After selecting your desired brew size and inserting a K-Cup pack, press the brew button to begin. The brew button typically illuminates to confirm activation, and the brewing process will commence immediately.
Ensure the K-Cup holder is securely closed; otherwise, the brew button may not function. During brewing, avoid opening the lid or removing the mug to prevent burns. Once the brewing cycle is complete, the brewer will automatically stop, and the brew button light will turn off.

Controls and Indicators
The Keurig K40 Elite features intuitive controls, including a power button and brew button, alongside indicator lights displaying the brewer’s status effectively.
Power Button Functionality
The Power Button on your Keurig K40 Elite is central to operation. Ensuring it’s firmly pressed activates the brewer, illuminating the green Power Light to confirm it’s on. If the button isn’t illuminating, verify the brewer is securely plugged into a functioning outlet – try a different outlet to rule out electrical issues. A secure connection is paramount for proper function. Remember to always plug the brewer directly into an outlet, avoiding extension cords if possible. Consistent power is vital for optimal brewing and preventing unexpected interruptions during your coffee-making process. Troubleshooting often begins with confirming power.
Indicator Light Meanings
Understanding the indicator lights on your Keurig K40 Elite is crucial for successful brewing. The green Power Light signifies the brewer is on and ready. If it’s not illuminated, double-check the power connection as detailed in the Power Button section. Other lights may indicate heating status or potential issues. Pay close attention to any flashing lights, as these often signal a need for attention, such as descaling or a water reservoir issue. Refer to the troubleshooting section for specific light patterns and their corresponding solutions. Consistent monitoring of these lights ensures optimal performance.
Brew Button Activation
Proper activation of the Brew Button is essential for initiating the brewing process on your Keurig K40 Elite. Ensure the K-Cup holder is securely closed; the brewer won’t operate if it’s not fully latched. Once secured, the Brew Button becomes active, allowing you to select your desired brew size. Pressing the button initiates the water heating and brewing cycle. If the button doesn’t activate, verify the handle is firmly closed and the power is on. A secure closure is paramount for safe and effective operation, preventing leaks and ensuring a perfect cup every time.

Programming Your Keurig K40 Elite
Customize your brewing experience with the auto-off timer feature, conserving energy and providing convenience. Adjust settings for optimal performance and enjoyment.
Auto-Off Timer Feature
The Keurig K40 Elite incorporates an automatic shut-off feature designed to conserve energy and enhance safety. This function automatically powers down the brewer after a period of inactivity, typically around one hour. To utilize this feature, simply allow the brewer to remain idle after your last brew cycle.
The system will automatically detect the inactivity and initiate the power-down sequence. This eliminates the need for manual intervention and provides peace of mind. It’s a convenient way to reduce energy consumption and ensure the brewer doesn’t remain unnecessarily powered on. Remember to always unplug the brewer when not in use for extended periods.
Adjusting Brew Strength (If Applicable)
The Keurig K40 Elite model does not feature a built-in adjustable brew strength setting. Unlike some newer Keurig models, this brewer offers a consistent brew strength for each K-Cup pack. However, you can influence the perceived strength by selecting different K-Cup varieties – choosing bolder roasts or those specifically designed for a stronger flavor profile.
Experimenting with different K-Cup options is the best way to customize your coffee experience with the K40 Elite. While direct strength adjustment isn’t available, the wide range of K-Cup choices allows for personalized brewing preferences.

Cleaning and Maintenance
Regular cleaning ensures optimal performance and extends the life of your Keurig K40 Elite. This includes external parts, the K-Cup holder, and descaling procedures.
Cleaning External Parts
To maintain a pristine Keurig K40 Elite, regularly clean the exterior surfaces. Begin by unplugging the brewer and allowing it to cool completely. Wipe down the exterior housing with a damp, soft cloth. Avoid abrasive cleaners, as they can damage the finish. Pay close attention to areas prone to spills or drips. The drip tray should be removed and washed with warm, soapy water; ensure it’s thoroughly rinsed and dried before reinserting.
Additionally, the exterior of the water reservoir can be wiped clean with a damp cloth. Consistent external cleaning not only enhances the brewer’s appearance but also contributes to a hygienic brewing environment, ensuring your beverages remain flavorful and enjoyable.
Cleaning the K-Cup Holder Assembly
Regularly cleaning the K-Cup holder assembly is crucial for optimal Keurig K40 Elite performance. Begin by removing the assembly from the brewer. Carefully separate the funnel and holder components. Wash both parts with warm, soapy water, ensuring all coffee grounds and residue are removed. A small brush can be helpful for reaching tight spaces.
Inspect the exit needle for any clogs and gently clear them with a paperclip if necessary. Rinse thoroughly and allow all parts to dry completely before reassembling and placing back into the brewer. This prevents buildup and ensures consistent brewing quality.
Cleaning the Water Reservoir/Lid
Maintaining a clean water reservoir and lid is vital for fresh-tasting beverages and preventing scale buildup in your Keurig K40 Elite. Remove the reservoir and discard any remaining water. Wash both the reservoir and lid with mild dish soap and warm water, rinsing thoroughly to remove all traces of soap.
Depending on your water’s mineral content, calcium deposits or scale may accumulate. Regular cleaning helps mitigate this. Ensure the reservoir is completely dry before refilling and replacing it on the brewer, contributing to optimal performance.
De-Scaling Your Keurig K40 Elite
Regular de-scaling is crucial for maintaining your Keurig K40 Elite’s performance. Scale, a non-toxic buildup from minerals in water, can hinder brewing efficiency. Follow Keurig’s recommended de-scaling solution instructions, or use a vinegar and water mixture (equal parts).
Run a full brew cycle with the solution, then several cycles with fresh water to rinse thoroughly. This process removes calcium deposits, ensuring optimal water flow and preserving the brewer’s longevity. De-scale every 3-6 months, depending on water hardness.

Troubleshooting Common Issues
Addressing typical problems like power failures, handle issues, or heating malfunctions is straightforward. Ensure secure connections and proper operation for quick fixes.
Brewer Does Not Have Power
If your Keurig K40 Elite fails to power on, begin by verifying the power cord is securely plugged into both the brewer and a functioning electrical outlet. It’s recommended to test the outlet with another device to confirm it’s delivering power.
Consider plugging the brewer into a different, independent outlet to rule out any potential circuit issues. Ensure the power button is fully engaged; a firm press is sometimes necessary.
Double-check that the brewer isn’t connected to a power strip or surge protector that might be switched off or overloaded. A direct connection to a wall outlet is always best for troubleshooting power concerns. If problems persist, professional repair may be needed.
Power Button Not Illuminating
If the power button on your Keurig K40 Elite doesn’t light up, first confirm the brewer is properly plugged into a working electrical outlet. A lack of illumination often indicates a power supply issue, but simple checks should be performed first. Ensure the power cord is firmly connected at both ends – the brewer and the wall.
Try a different outlet to eliminate the possibility of a faulty socket. Verify the K-Cup pack holder is securely closed, as some models prevent operation if it’s not latched correctly. If the light still doesn’t illuminate, further troubleshooting or repair may be necessary.
Handle Not Securing Properly
A common issue with the Keurig K40 Elite is the handle failing to secure, preventing the brewing process from starting. This typically means the K-Cup pack holder isn’t fully closed and latched. Ensure there are no obstructions, like coffee grounds or debris, preventing a tight seal. Inspect the K-Cup holder assembly for any damage or misalignment.
Confirm the K-Cup pack is properly inserted and not overflowing. The brew buttons won’t activate unless the handle is securely locked into place. If the problem persists, a thorough cleaning of the handle and surrounding areas might resolve the issue.
Addressing Heating Problems & Repair
If your Keurig K40 Elite isn’t heating, first verify it’s plugged securely into a functioning outlet. Try a different outlet to rule out electrical issues. Scale buildup is a frequent cause of heating problems; regular descaling is crucial for optimal performance. If descaling doesn’t resolve the issue, internal heating components may be failing.
Attempting repairs yourself can be dangerous and void the warranty. For complex heating issues, contacting Keurig customer support or a qualified appliance repair technician is highly recommended. Do not disassemble the brewer beyond basic cleaning procedures.

Advanced Troubleshooting
For persistent issues, address clogs and water flow problems. Understanding potential error codes, if present, will aid in diagnosing complex malfunctions effectively.
Dealing with Clogged Brewers
A clogged Keurig K40 Elite can significantly hinder brewing performance. Mineral buildup, particularly from hard water, is a common culprit. Begin by descaling the brewer thoroughly, following the instructions detailed in the cleaning section of this manual. If descaling doesn’t resolve the issue, carefully inspect the exit needle and the K-Cup holder for any visible obstructions.
Use a paperclip or Keurig’s cleaning tool to gently clear any debris. Ensure the brewer is unplugged during this process. For stubborn clogs, consider running several brew cycles with only water, allowing the water to flush through the system. Persistent clogging may indicate a need for professional repair or a replacement unit, especially if the issue recurs frequently despite regular maintenance.
Resolving Water Flow Issues
Insufficient water flow in your Keurig K40 Elite often stems from mineral deposits or airlocks. First, ensure the water reservoir is properly seated and filled with fresh water. If the flow remains weak, descale the brewer following the detailed instructions in the maintenance section. Check the water intake valve within the reservoir for any blockages, carefully removing any debris.
To address potential airlocks, try lifting and reseating the water reservoir several times while the brewer is running a brew cycle. If problems persist, unplug the unit and allow it to sit for 15-20 minutes before attempting to brew again. Consistent flow issues may necessitate professional servicing.
Understanding Error Codes (If Applicable)
The Keurig K40 Elite model typically doesn’t display complex error codes like newer brewers. However, indicator light patterns can signal issues. A rapidly flashing light often indicates a heating problem or internal malfunction. If the power button isn’t illuminating, verify the brewer is securely plugged into a functioning outlet and try a different outlet to rule out electrical issues.
Consistent failure to brew, even after descaling and checking water levels, suggests a potential pump failure requiring professional repair. Refer to the troubleshooting section for common light patterns and their corresponding solutions before seeking service.

Safety Precautions
Always unplug the brewer before cleaning, avoid immersing it in water, and use caution with hot liquids to prevent burns or electrical hazards.
Important Safety Instructions
To reduce the risk of fire, electric shock, or injury, carefully read and follow these safety guidelines. Only use the Keurig K40 Elite for its intended purpose – brewing beverages. Never immerse the brewer in water or other liquids. Always unplug the appliance before cleaning or performing maintenance.
Do not operate the brewer with a damaged cord or plug. Avoid using extension cords. Hot surfaces can cause burns; exercise caution when handling freshly brewed coffee. Keep the appliance out of reach of children. Ensure the brewer is placed on a stable, level surface. Never attempt to repair the brewer yourself; contact qualified service personnel for assistance.
Electrical Safety Guidelines
To ensure safe operation, always plug the Keurig K40 Elite into a grounded electrical outlet. Avoid using extension cords or adapters. Never operate the brewer if the power cord or plug is damaged. Do not handle the appliance with wet hands. Ensure the voltage of your outlet matches the brewer’s specifications.
If the brewer malfunctions or experiences an electrical issue, immediately unplug it and contact qualified service personnel. Do not attempt to disassemble or repair the electrical components yourself. Regularly inspect the power cord for any signs of damage. Keep the electrical connections dry and free from debris.