Pocket Hole Screw Guide: A Comprehensive Overview (Updated 02/02/2026)
This guide details pocket hole joinery, covering jigs, screws, and techniques for strong, hidden joints․ Hardened steel, self-tapping screws are ideal for hardwoods․
What is Pocket Hole Joinery?
Pocket hole joinery is a woodworking technique used to create strong, hidden joints in furniture and other projects․ It involves drilling angled holes – “pocket holes” – into one workpiece, then joining it to another using self-tapping screws․ This method is lauded for its speed, simplicity, and accessibility, making it exceptionally beginner-friendly․
Unlike traditional joinery methods requiring precise cuts and glue-ups, pocket holes offer a fast and reliable alternative․ Specialized jigs ensure consistent hole angles and depths․ Screws designed for pocket hole joinery, often featuring integral washered cheese heads, prevent pull-through and maximize holding power, even in end grain․ It’s a versatile technique suitable for various wood thicknesses and project scales․
The Core Components of a Pocket Hole System
A functional pocket hole system fundamentally comprises three essential components working in harmony․ First, the drill guide establishes the correct angle for drilling consistent pocket holes․ These guides come in various designs, influencing portability and precision․ Secondly, the pocket hole drill bit, typically a stepped bit, creates the angled hole with a consistent diameter․
Finally, the drill bit stop collar is crucial for controlling drilling depth, preventing damage to the workpiece and ensuring proper screw placement․ These components, often integrated within a jig, streamline the process․ Quality systems prioritize hardened steel for durability and self-tapping screw compatibility, eliminating the need for pilot holes in many hardwoods․
Drill Guides and Their Variations
Drill guides are central to accurate pocket hole creation, dictating the angle at which the bit enters the wood․ Variations range from simple, fixed-angle guides to more sophisticated adjustable models․ Kreg Jigs exemplify this, offering diverse systems catering to different needs․ Portable jigs feature streamlined guides for on-the-go projects, while advanced systems boast enhanced adjustability and features․
The guide securely holds the drill bit, ensuring consistent hole placement․ Material quality is key; durable guides maintain accuracy over time․ Some guides incorporate features like dust collection ports․ Ultimately, the ideal drill guide depends on project scale, frequency of use, and desired precision․
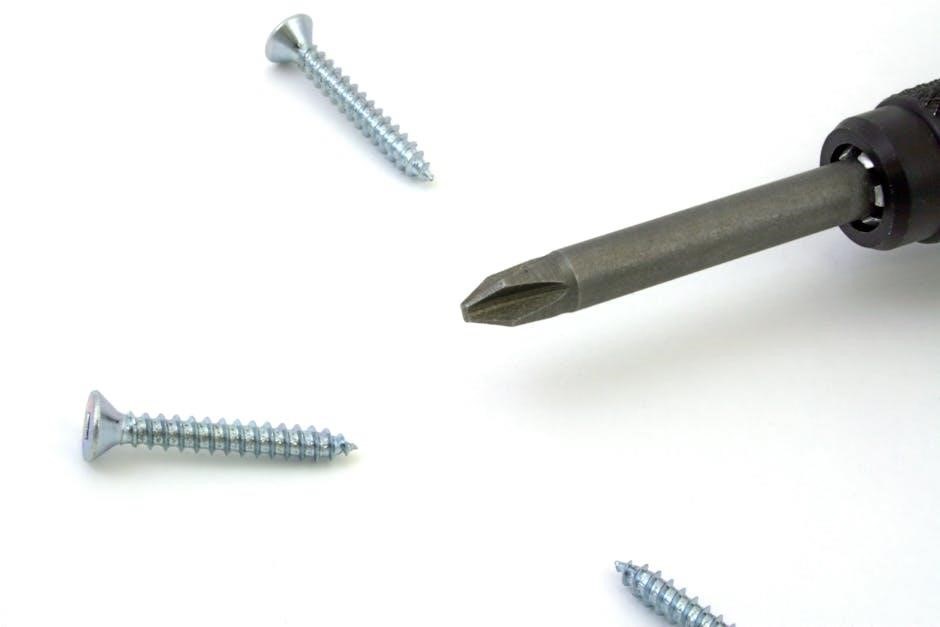
Pocket Hole Drill Bits: Stepped Design Explained
Pocket hole drill bits aren’t standard; they feature a unique stepped design․ This crucial element allows for drilling a consistent depth pocket hole without needing to adjust the drill’s depth setting constantly․ The larger diameter section creates the pocket, while the thinner shank fits into the drill guide․
This stepped configuration ensures the hole is appropriately sized for the chosen screw length, maximizing joint strength․ Using a standard bit won’t yield the correct angle or depth․ High-quality bits maintain sharpness, producing clean, accurate holes, essential for a reliable pocket hole joint․
Drill Bit Stop Collars: Ensuring Consistent Depth
Drill bit stop collars are vital components of a pocket hole system, guaranteeing uniform pocket hole depth across all joints․ These adjustable collars slide onto the drill bit, limiting its penetration into the wood․ Proper adjustment, based on material thickness and screw length, is critical for optimal performance․

Without a stop collar, drilling depth will vary, leading to weak or failed joints․ Accurate depth ensures the screw engages sufficiently with both workpieces․ Regularly check and tighten the collar to prevent slippage during operation, maintaining consistency throughout your project․
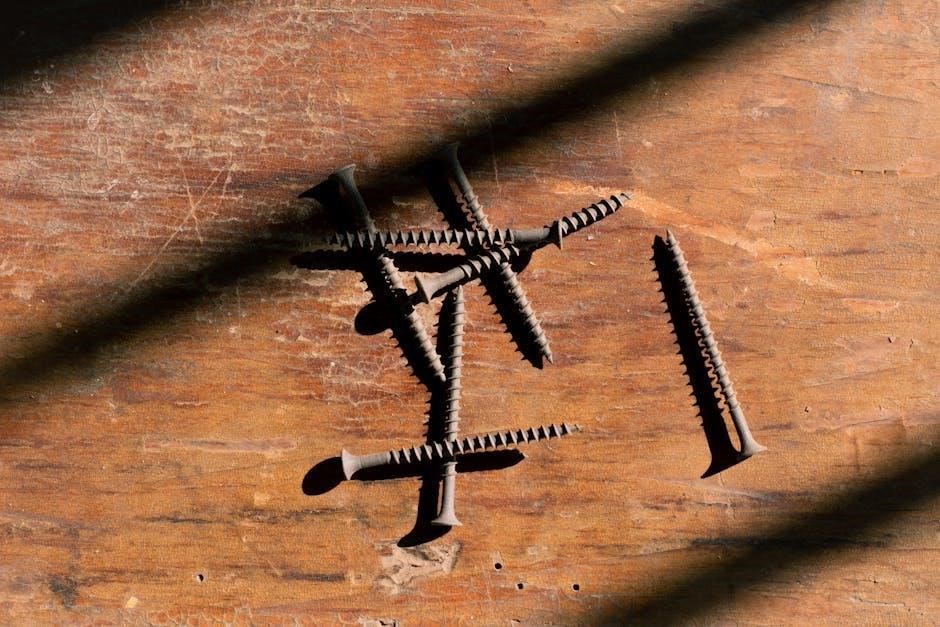
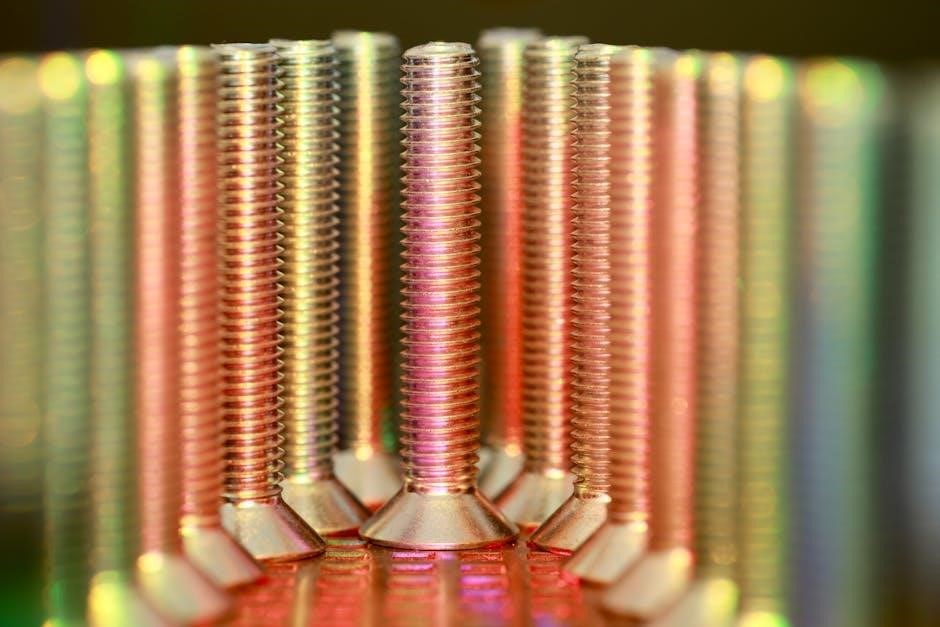
Pocket Hole Screw Types: A Detailed Breakdown
Pocket hole screws aren’t standard wood screws; they’re specifically designed for this joinery method․ Hardened steel, self-tapping screws eliminate the need for pre-drilling, even in dense hardwoods and laminated boards․ A key feature is the integral washered cheese head, preventing pull-through when joining end grain to face grain․
These screws come in various lengths and thread types․ Choosing the correct screw is crucial for joint strength․ Understanding the differences between coarse and fine threads, and matching them to the wood type, will ensure a secure and lasting connection․
Self-Tapping Screws for Hardwoods
For hardwoods, utilizing self-tapping pocket hole screws is highly recommended․ These screws, constructed from hardened steel, possess a unique ability to create their own threads as they are driven into the wood, negating the necessity for pre-drilled pilot holes․ This feature significantly streamlines the assembly process, saving both time and effort․
The design incorporates an integral washered cheese head, a critical element for preventing the screw from pulling through the end grain of the timber․ This ensures a robust and durable joint, even with challenging wood species․ Selecting the appropriate length remains vital for optimal performance․
Screws with Integral Washered Cheese Heads
Pocket hole screws featuring integral washered cheese heads are specifically engineered for woodworking applications, particularly when utilizing pocket hole joinery․ The integrated washer dramatically increases the surface area in contact with the wood, effectively preventing the screw from pulling through the end grain․ This is a common issue when joining boards, especially softer woods․
The cheese head design further contributes to a clean and professional finish, countersinking neatly into the pocket hole․ These screws are often constructed from hardened steel, ensuring durability and reliable self-tapping performance, even in dense hardwoods, eliminating the need for pilot holes․
Coarse vs․ Fine Thread Screws: Which to Choose?

Selecting between coarse and fine thread pocket hole screws depends largely on the wood species and density․ Coarse thread screws are generally recommended for softer woods like pine or fir․ Their wider threads bite aggressively, providing a strong hold and reducing the risk of stripping the screw hole․
Conversely, fine thread screws excel in hardwoods such as maple or oak․ The finer threads offer greater holding power in denser materials, minimizing the chance of pull-out․ Using fine threads in softwoods can lead to splitting, while coarse threads in hardwoods may struggle to gain sufficient grip․
Screw Length Selection: Matching Screw to Material Thickness
Proper screw length is crucial for a robust pocket hole joint․ Too short, and the screw won’t adequately secure the pieces; too long, and it risks blowout․ A general rule is to select a screw length that penetrates at least half the thickness of the second workpiece․
Consider the wood’s density; softer woods require less penetration․ Always err on the side of caution and test a sample joint․ Avoiding screw blowout involves choosing the correct length and ensuring the pocket hole is drilled accurately․ Charts correlating wood thickness to ideal screw lengths are readily available online․
Determining Optimal Screw Length for Different Wood Thicknesses
Optimal screw length varies significantly with material thickness․ For ¾” wood, a 1 ¼” screw is generally suitable, providing sufficient bite into the receiving piece․ With 1 ½” stock, a 1 ½” or 1 ¾” screw is recommended․ Thinner materials, like ½”, require shorter screws – typically ¾” to 1” – to prevent breakthrough․
Always consider the wood species; hardwoods demand longer screws than softwoods․ A helpful guideline is to ensure at least ½” of the screw’s length is embedded in the second board․ Testing with scrap pieces is vital to confirm a secure, blowout-free connection before final assembly․
Avoiding Screw Blowout: A Length Guide
Screw blowout, where the screw exits the side of the wood, is a common pocket hole issue․ To prevent this, carefully match screw length to wood thickness․ Screws that are too long will inevitably cause blowout, especially in end grain․ Integral washered cheese heads, commonly found with Trend jigs, help distribute pressure and minimize this risk․
As a rule, ensure at least half the screw’s length is securely within the second piece of wood․ When in doubt, err on the side of a slightly shorter screw․ Pre-drilling, though generally unnecessary with self-tapping screws, can further reduce blowout risk in particularly dense hardwoods․
Pocket Hole Jig Types and Compatibility
Pocket hole jigs vary significantly, from portable models for occasional use to advanced systems designed for high-volume work․ Kreg Jig systems are widely recognized, offering a range of options․ These jigs share core components: a drill guide, a drill bit, and a drill bit stop collar․
Compatibility between jigs and screw sizes is crucial․ Different jigs accommodate different screw diameters and lengths․ Ensure the jig you choose supports the screws you intend to use․ Some jigs are more versatile, accepting multiple screw types, while others are optimized for specific screws․ Consider your project needs when selecting a jig․
Kreg Jig Systems: An Overview
Kreg Jig systems dominate the pocket hole joinery market, known for precision and reliability․ Several variations exist, each with a slightly different design, but all maintain the core functionality of a drill guide, drill bit, and stop collar․ These systems cater to diverse needs, from basic DIY projects to professional woodworking․
Kreg offers portable jigs for flexibility and larger, benchtop models for increased capacity and ease of use․ Their advanced systems often include features like adjustable fences and dust collection ports․ Choosing the right Kreg Jig depends on project scale and frequency of use, ensuring efficient and accurate pocket hole drilling․
Portable vs․ Advanced Pocket Hole Jigs
Portable pocket hole jigs are ideal for hobbyists and those with limited workspace, offering convenience and affordability․ These compact jigs are easily transportable, making them suitable for on-site projects or occasional use․ However, they often require more manual adjustments and may lack features found in advanced systems․
Advanced jigs, typically benchtop models, prioritize speed and precision․ They often include adjustable fences, integrated dust collection, and multiple drilling angles․ While more expensive, these features streamline the process and enhance accuracy for high-volume work․ The choice depends on project frequency and desired level of convenience․
Jig Compatibility with Different Screw Sizes
Pocket hole jig systems are designed with specific screw size compatibility in mind․ Kreg Jigs, for example, have variations that accommodate different screw lengths and diameters․ It’s crucial to verify that your jig supports the screw size needed for your project’s material thickness․
Using incompatible screws can lead to issues like screw blowout or weak joints․ Most jigs offer adjustable drill guides and stop collars to fine-tune the pocket hole depth for optimal screw engagement․ Always consult the jig manufacturer’s guidelines to ensure proper screw selection and setup for reliable results․
Drilling Pocket Holes: A Step-by-Step Guide
Begin by securely setting up your drill guide and stop collar on the pocket hole jig․ The stop collar dictates the drilling depth, ensuring consistent pocket hole creation․ Clamp the workpiece firmly to the jig using the integrated clamping mechanism for stability during drilling․
Employ a stepped pocket hole drill bit, drilling at the correct angle as guided by the jig․ Maintain consistent pressure and speed for clean, accurate holes․ Repeat this process for each desired pocket hole location․ Proper setup and technique are vital for strong, reliable pocket hole joints․
Setting Up the Drill Guide and Stop Collar
The drill guide, a primary component of any pocket hole system, establishes the correct drilling angle․ Securely attach the guide to your jig, ensuring it’s firmly in place before proceeding․ Next, adjust the drill bit stop collar; this crucial step controls the depth of the pocket hole․
The stop collar prevents drilling too deep, which could compromise the wood’s integrity․ Refer to the jig’s instructions for recommended settings based on material thickness․ Precise adjustment is key to creating functional, aesthetically pleasing joints․ Double-check your setup before drilling!
Drilling at the Correct Angle

Achieving the correct drilling angle is paramount for successful pocket hole joinery․ The drill guide, a fundamental part of the system, is specifically designed to hold the drill bit at the optimal angle․ This angle ensures the screw will properly engage the receiving piece of wood, creating a strong and reliable joint․
Typically, pocket hole angles are around 15 to 20 degrees․ Ensure the drill guide is securely fastened to the jig before drilling․ Maintaining this consistent angle is vital; deviations can lead to weak joints or screw blowout․ Always follow the manufacturer’s recommendations for your specific jig․
Clamping Mechanisms for Secure Drilling
Securely clamping the workpiece is crucial when drilling pocket holes․ Most pocket hole jigs incorporate clamping mechanisms to prevent movement during drilling, ensuring accuracy and safety․ These clamps firmly hold the wood in place, minimizing the risk of splintering or inaccurate hole placement․
Effective clamping also prevents the drill bit from “walking” or deviating from the intended path․ Different jig designs utilize various clamping methods – some employ quick-action clamps, while others use threaded knobs․ Regardless of the type, ensure the clamp applies even pressure․ A stable setup guarantees clean, consistent pocket holes, leading to stronger joints․
Assembling with Pocket Hole Screws
Proper screw insertion is vital for strong pocket hole joints․ Insert screws straight and apply consistent pressure while driving them into the receiving wood․ Avoid angling the drill, as this can cause the screw to strip or split the wood․ Self-tapping screws designed for pocket holes minimize the risk of splitting, especially in hardwoods․
Prevent wood splitting by ensuring the screw is fully seated, but avoid over-tightening․ Over-tightening can strip the threads or damage the wood fibers․ Tighten screws until snug, creating a firm, secure connection․ Optimal joint strength relies on correct screw placement and appropriate tightening․
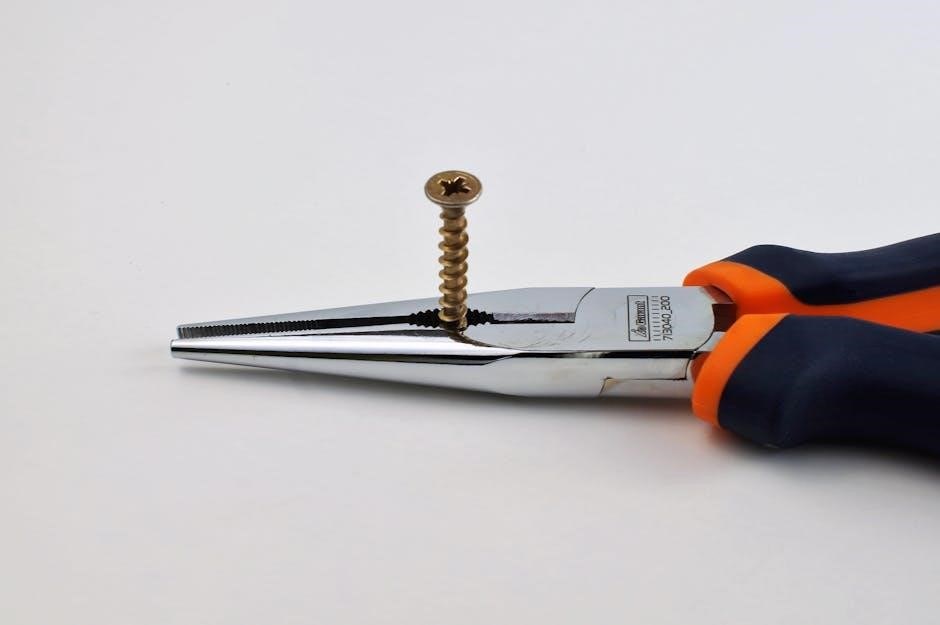
Proper Screw Insertion Techniques
Successful assembly hinges on mastering screw insertion․ Begin by aligning the screw with the pocket hole opening, ensuring a straight entry path․ Apply firm, consistent pressure as you drive the screw, preventing wobble or deviation․ Utilize a drill with adjustable clutch settings to avoid overdriving and stripping the screw head․
Maintain a slow, controlled speed during insertion, allowing the self-tapping screw to efficiently cut into the wood fibers․ Avoid excessive force, which can lead to splitting, particularly in end grain․ Regularly check screw depth to confirm proper engagement and optimal joint strength․
Preventing Wood Splitting During Assembly
Wood splitting is a common concern in pocket hole joinery, but easily mitigated․ Employ screws with integral washered cheese heads; these distribute clamping force, reducing pressure on the wood fibers․ Pre-drilling pilot holes, though generally unnecessary with self-tapping screws, can be beneficial in exceptionally dense hardwoods․
Carefully select the appropriate screw length – too long, and it will protrude, potentially splitting the wood; too short, and the joint will lack strength․ Avoid over-tightening screws, as this dramatically increases the risk of splitting․ Slow, controlled insertion is key to a clean, secure joint․

Tightening Screws for Optimal Joint Strength
Achieving optimal joint strength relies on proper screw tightening․ The goal isn’t maximum force, but sufficient clamping pressure to draw the wood fibers together․ Tighten screws until snug, feeling resistance, but avoid over-tightening, which can strip the screw or split the wood․
Consistent tightening is crucial․ A slight “give” should remain, allowing for natural wood movement․ For larger assemblies, tighten screws in a crosswise pattern to distribute pressure evenly․ Regularly inspect joints; if screws loosen over time, gently re-tighten them to maintain structural integrity and a lasting bond․
Troubleshooting Common Pocket Hole Issues
Pocket hole joinery, while reliable, can present challenges․ Screw blowout, often from using screws too long or working with end grain, requires using shorter screws or adding glue․ Wood splitting can be prevented by pre-drilling pilot holes in particularly dense woods or adjusting screw length․
Weak joints usually stem from insufficient clamping pressure during assembly or using incorrect screw types․ Ensure proper screw insertion and consider adding wood glue for enhanced strength․ Regularly inspect joints and address any issues promptly to maintain structural integrity and prevent further complications․
Screw Blowout: Causes and Solutions

Screw blowout, a common frustration, occurs when the screw exits the wood instead of creating a secure joint․ This typically happens with longer screws used in softer woods or when working with end grain, lacking sufficient material to grip․ The integral washered cheese heads on specialized screws help mitigate this․
Solutions include selecting shorter screws appropriate for the wood thickness, applying wood glue to reinforce the joint, or utilizing a clamping mechanism to hold the pieces firmly together during screw insertion․ Pre-drilling a pilot hole, even with self-tapping screws, can also reduce blowout risk․
Wood Splitting: Prevention and Repair
Wood splitting during pocket hole joinery often arises from using screws that are too long or too wide for the wood’s thickness, especially near edges or end grain․ Insufficient clamping pressure can also contribute, allowing the wood to move during screw insertion․ Proper screw length selection is crucial to avoid this issue․
To prevent splitting, always use screws designed for pocket hole construction and ensure adequate clamping․ If splitting occurs, wood glue can be used to repair the damage, clamping the pieces until the glue dries․ For larger splits, wood filler may be necessary before sanding and finishing․
Weak Joints: Identifying and Correcting Problems
Weak pocket hole joints typically stem from insufficient screw engagement, incorrect screw type selection, or inadequate clamping pressure during assembly․ Identifying the issue involves examining the joint for movement or gaps․ Screws should fully penetrate the receiving wood, but avoid blowout․
Correcting weak joints may require drilling new pocket holes, using longer or wider screws, or applying wood glue for added strength․ Ensure proper clamping throughout the assembly process․ If the wood is damaged, consider reinforcing the joint with additional supports or hardware․ Regularly check screw tightness over time․
Advanced Pocket Hole Techniques
Beyond basic joinery, pocket holes excel in specialized applications․ For face frames, strategically placed pocket holes create strong, concealed connections․ Angled pocket hole joints allow for unique designs, requiring adjustable jig settings and careful planning․ Achieving a flawless finish often involves utilizing pocket hole plugs, concealing the screws for a seamless appearance․
Experimenting with different screw lengths and angles expands design possibilities․ Mastering these techniques unlocks greater versatility and allows for complex woodworking projects․ Remember to always test joints before final assembly and prioritize precision for optimal results․
Using Pocket Holes for Face Frames
Pocket hole joinery is exceptionally well-suited for constructing face frames, offering both strength and a clean aesthetic․ By drilling pocket holes into the back of the face frame pieces, screws create hidden, robust connections to the cabinet box․ This method eliminates the need for exposed fasteners or complicated joinery techniques․
Ensure accurate alignment and clamping during assembly for square and stable frames․ Utilizing the correct screw length is crucial to prevent blowout․ Pocket holes provide a fast and reliable method for building durable face frames, streamlining the cabinet-making process․
Creating Angled Pocket Hole Joints
While standard pocket hole joinery excels in 90-degree connections, angled joints require a slightly modified approach․ Specialized angled drill guides, or adjustable jig features, allow for precise pocket hole placement on angled surfaces․ Careful consideration of screw length is paramount; shorter screws are often necessary to avoid penetrating the adjoining piece․
Proper clamping becomes even more critical to maintain alignment during screw insertion․ Angled pocket hole joints are ideal for building frames, boxes, and decorative elements where a clean, strong, and visually appealing connection is desired․ Practice on scrap wood first!
Pocket Hole Plugs for a Clean Finish
For projects demanding a flawless, furniture-grade appearance, pocket hole plugs offer an excellent solution․ These small, typically wood, plugs are inserted into the drilled pocket holes after assembly, concealing the screw heads․ Selecting plugs that precisely match the wood species ensures a seamless blend․
A small amount of wood glue applied before insertion aids adhesion․ Once the glue dries, the plugs are carefully trimmed flush with the surface using a flush-cut saw or a block plane․ Sanding completes the process, leaving a virtually invisible repair and a beautifully finished joint․